How to Clean & Oil a Watch:
A Beginners Guide - Section 4
Written by: Kevin James
Copyright © Kevin James. All Rights Reserved.
Removing the Dial
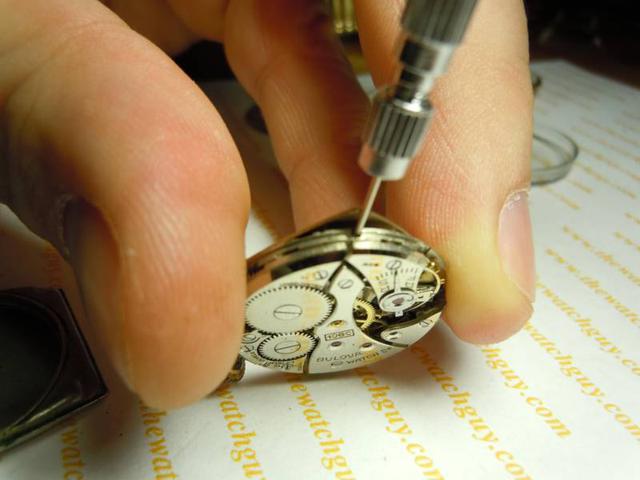
Dials are held in place with tiny posts called "feet" that are soldered to the back of the dial. The feet fit into holes in the movement, and tiny screws in the side of the movement hold the feet (and the dial) firmly in place. Generally there are 2 or 3 feet. Use one of your smallest screwdrivers and loosen these screws (see red arrow) as shown in the photo's below.
Sometimes there are no "dial feet screws" through the side of the movement. This is typical in older movements. Look for the screws on the back of the movement. In this situation you will notice some unusual looking screws next to a copper post. These screws are a bit strange. The head of these screws has one side sheared off. The post sits right next to the screw, and when the screw is turned, the other half of the screw presses into the post, holding it in place. Look around the edge of the movement (or the back of the movement) and locate these tiny screws. There are usually 2 of them on wrist watches and 3 of them on pocket watches (usually!). Loosen the screws insuch a way that the feet can clear the screw head.
Either way, the dial should lift off easily. Do NOT pry it... ceramic dials will crack, and metal dials will bend if you do! If it doesn't come off easily, loosen the screws a tiny bit more and try again.
Place the dial in the parts tray.
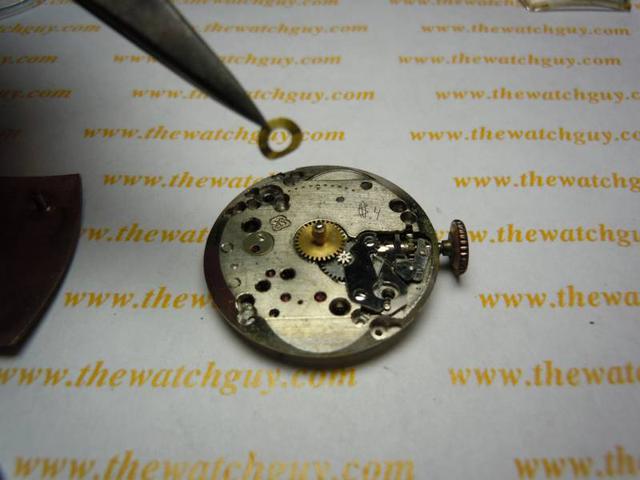
Removing the Hour Wheel
Under the dial, in the center, you will notice a gear in the center of the movement. This gear is called the "hour wheel". Sometimes this gear will have a small (paper thin) brass or gold colored washer sitting loosely on it. This tiny flat ring acts like a spring that (when the dial is in place) keeps the hour wheel from popping up and skipping. Take your tweezers and remove the gear (and the ring if present). It should slide right off.
Put it in your parts tray.
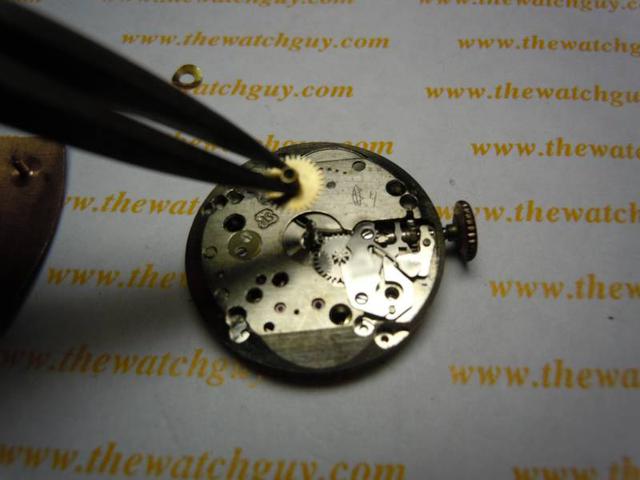
Removing the Cannon Pinion
After removing the hour wheel, you will notice another smaller gear attached to a small shaft. This is called the "Cannon Pinion". The "cannon pinion" is hollow in the center and fits tightly over the post of the "center wheel". Removing it can sometimes be difficult and may result in damage to the Cannon Pinion. I usually do not remove it when cleaning a movement unless the movement is very gummed up.
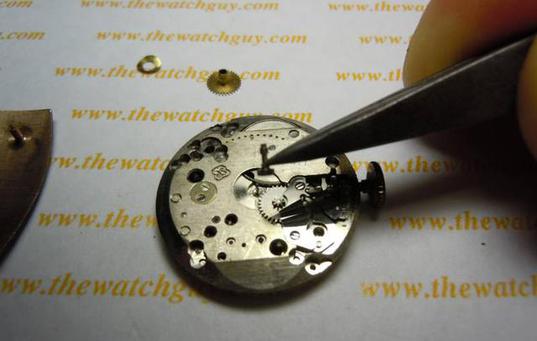
However, if you want to remove it you can use your tweezers to grip the Cannon Pinion at the base and slide it straight off of it's post.
When it comes to the Cannon Pinion the key is to be gentle... the cannon pinion is easy to crush or break (or lose). (Hint: If you pry under the gears of the cannon pinion with a screwdriver, you will have problems... it will zing off to never be found, or one of the gears will break, or you will break the center wheel arbor)
Turn the movement over (dial side down)
NOTE: NOW IS THE TIME TO WORK ON THE OTHER SIDE OF THE WATCH. DO NOT TURN IT OVER AND SET IT ON A FLAT HARD SURFACE. YOU WILL NOTICE THAT THE SECOND HAND POST AND THE CENTER WHEEL POST ARE PROTRUDING. IF YOU TURN IT OVER AND START WORKING ON A HARD SURFACE, YOU WILL SNAP THE POSTS OFF.'
You should consider buying a movement holder. You can also drill a 3/4 inch hole in a small piece of wood to support the movement face down while the posts inside the hole.
Place the movement "Pillar Plate" down on a movement holder. You will notice that the back of the watch is segmented. These segments are called "Bridges". Bridges have small jewel holes. They hold a series of gears and other parts inside..

<================== Dial Screw